Pinning the E-Mail Message
Do you have important emails you need to be able to quickly access from your Inbox in Outlook? How to pin an email to the top of my Inbox, you ask? Here is how I effectively “Pin” an e-mail message to the top of my Inbox. There are a few ways to accomplish this. The first two approaches try to make due with the version of Outlook you may have. The last option presented is for a built-in feature.
Option 1: Use the Task Pane
First, I keep the Task Pane in view. Next, when I want to Pin an e-mail message, I set the Follow Up flag to No Date. That way, those messages are at the top of my Tasks list always. Below are the steps in Outlook 2016.
Note that in Outlook Web Access in Office 365, there is a built-in Pin feature.
Turning on The Tasks Pane in Outlook
Follow these steps to turn on the Tasks pane in Outlook 2016. Older versions would use similar steps.
Step 1: Go to the View tab in the ribbon.

Step 2: In the Layout group, click the To-Do Bar menu.

Step 3: Click Tasks.
Now, at this point you should see the Tasks pane on the far right column of the Outlook window.
Set the Follow Up Flag to No Date to Pin the E-Mail Message
Now, in order to pin the e-mail message to the top of your inbox so that you can easily access the email at any time do the following.
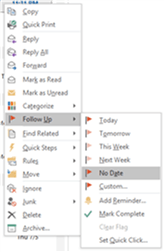
Step 1: Right-click the e-mail message you want to pin.
Step 2: Click Follow-up in the context menu.
Step 3: Depending on your mail account type, you may see different options. Either select Flag Message or No Date. These will sort to the top of the Tasks pane.
Unpinning the E-Mail Message
In order to unpin the e-mail message, just click the flag icon. You would normally to this to indicate a task was complete, but it will also remove it from the listing.
So, that is how to pin an email to the top of my Inbox. This works in Outlook 2016 and older versions too. As noted above, Outlook Web Access in Office 365 has the pin feature built in.
Option 2: Create a “! Pinned” Category
This might be an option for you if you don’t use the Category feature in Outlook already.
Create a “! Pinned” Category
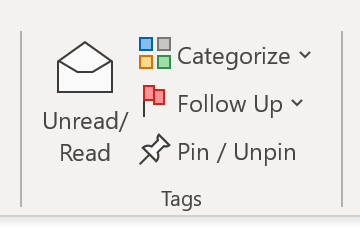
In the Tags group on the Home tab on the ribbon, click Categorize.
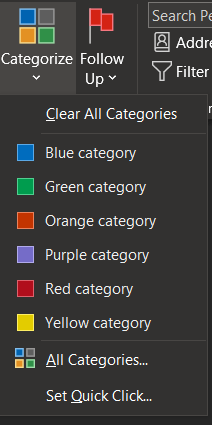
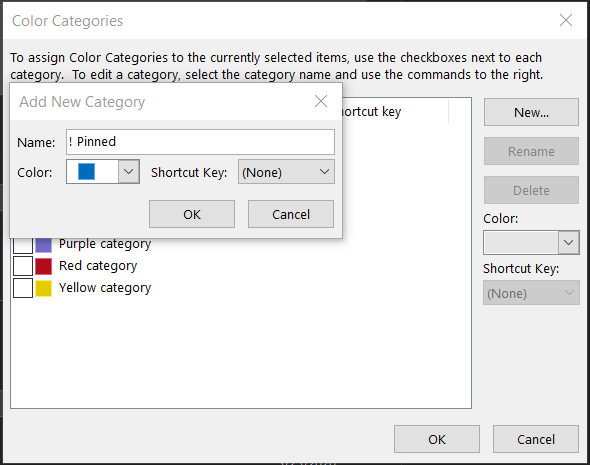
Next, select All Categories. On the Color Category window that pops up click the New button. Name your new category “! Pinned” (without the quotes). Select OK, then OK to create the new category.
Now, change your view to sort by Category, in reverse alphabetical order.
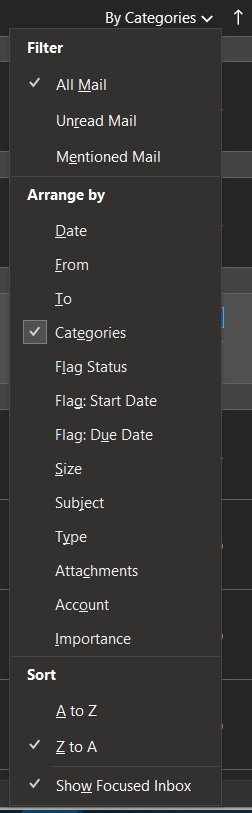
Select Category in the Arrange By section of the menu. And select Z to A in the Sort section of the menu.
Now, when you apply the ! Pinned category to any email, it will show up at the top of your list.
Note that this will only work if you’re not already using categories. This is because if you are, the categorized emails will appear above the ! Pinned category while the uncategorized emails will appear below the ! Pinned category.
Option 3: Use the New Built-In Feature in Microsoft 365
Pinning important emails to the top of your inbox is something that people have wanted for a long time.
Starting in September of 2020 Microsoft began trickling out the feature to its Microsoft 365 subscribers using Outlook for Windows. Outlook for Android and Outlook for iOS are supposed to be coming soon.
If want to skip the setup above and try out the latest and greatest from Microsoft you can usually find a good deal thru places like Amazon.
The built-in feature is supposed to allow you to minimize the pinned section to get the pinned emails out of the way. You can also pin emails in folders, but the feature isn’t yet available in built-in folders such as Drafts or Sent Items.
The subscription version of Outlook in Microsoft 365 costs less up front and is continually updated with the newest features. It is also available in Outlook on the web.


Amazing!!!! Thank you. I have been wanting to be able to do this for so long!!