Having Your Cake and Eating It Too
SharePoint text fields (Multi line) have some limitations. In SharePoint, you can enable your text fields (of type Multiple Lines of Text) to keep a running revision history of all the changes in that field. This is great when you need to see the history of comments provided, for example. There are some limitations, however, that come along with that when viewing and editing text in a SharePoint list view.
First, you cannot directly view the most recently text entered. You instead see a link to View items which just opens up the associated form for the item where you could see the text field and its history (not really that helpful). If you need to be able to show the most recent text entry in a list view you can still do that. See my notes in “Show the most recent comment from SharePoint text fields instead of View Items.”
Next, if you need to be able to edit the text field while in list view (datasheet in 2010 or edit this list in SharePoint 2013) you cannot do that either. You can edit text fields that do not keep track of history, but that’s often not what you need. So being able to edit in list view, retain history, and have the field show up like a version-tracked text field in our InfoPath forms are all needed. Sometimes, we need to have our cake and eat it too. To see how to work around SharePoint’s limitations, read on.
The outline immediately below describes how to go about working around the second SharePoint limitation mentioned above. If you are experienced with SharePoint you may be able to scan the outline and just jump into your own site and be on your way. Further below, I also give a step-by-step set of instructions for getting this set up.
Summary of the Approach
In order to work around the in-list-view editing limitation mentioned above, I have use the following general steps to provide intended capability.
- Create a text field to contain your version history. This would be of type Multiple Lines of Text and have Append Changes to Existing Text enabled. For example, you might call this field TEXT_HISTORY.
- Create a text field to serve as the editable field in the list view. This would also be of type Multiple Lines of Text and would not have Append Changes to Existing Text enabled. For example, you might call this field TEXT_INPUT. Note that you will need to make this field only accept plain text. I have not come up with a workaround yet where rich text would be accepted.
- Create a workflow that triggers on change. In the workflow, if TEXT_INPUT is not empty, copy its contents to TEXT_HISTORY. Next, erase TEXT_INPUT (to see how to erase a text field, see “How to Erase or Blank a Text Field with a Workflow in SharePoint Designer”).
- Finally, on the InfoPath form for the item (assuming you’re using one) just stack the TEXT_INPUT field over the TEXT_HISTORY field. Delete the text entry part of the TEXT_HISTORY field and adjust the spacing and formatting so that it’s essentially the same as the original TEXT_HISTORY field all by itself.
Once these things are done, both the form and the list will operate as desired for your customers. Of course, with two new caveats.
- This only works with text-only edits.
- The list view will not erase the field contents until you refresh the list view.
Step-by-Step Instructions
Defining the TEXT_HISTORY Field
- For the type, use Multiple lines of text.
- For the type of text to allow, select Plain text. (I have not devised a workaround to make Enhanced rich text work)
- For Append Changes to Existing Text, select Yes.
Defining the TEXT_INPUT Field
- For the type, use Multiple lines of text.
- For the type of text to allow, select Plain text.
- For Append Changes to Existing Text, select No.
Creating the Workflow
Now you will need to set up the workflow that will glue this together. First, create a new workflow (or open an existing on you have on your list).
Check to see if there’s any new text
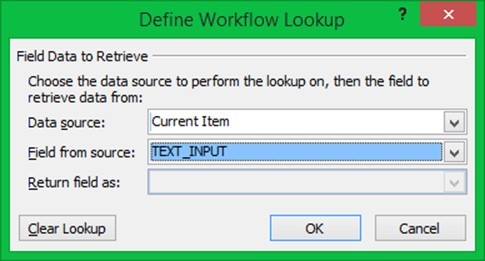
Select If any value equals value from the Condition menu in the ribbon.
For the first value, select TEXT_INPUT in the Field from source drop down list.
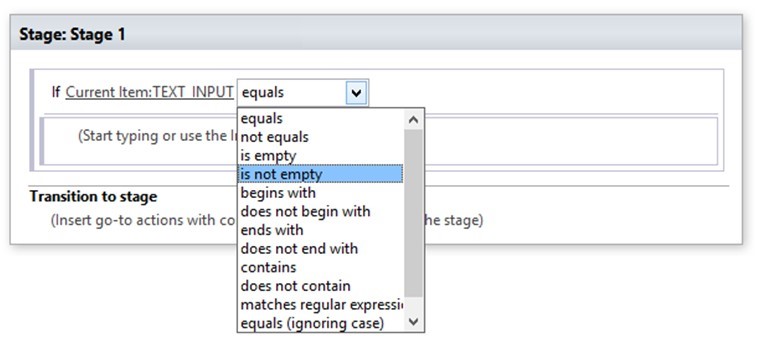
Next, select equals and choose is not empty from the drop down list.
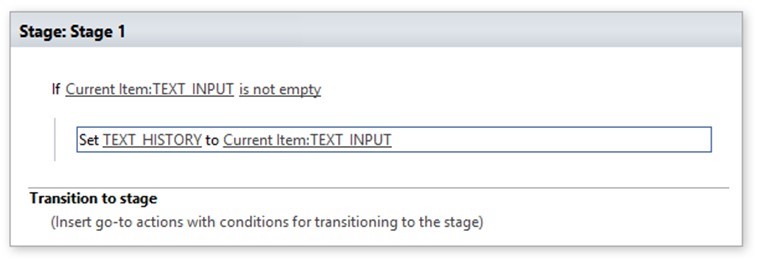
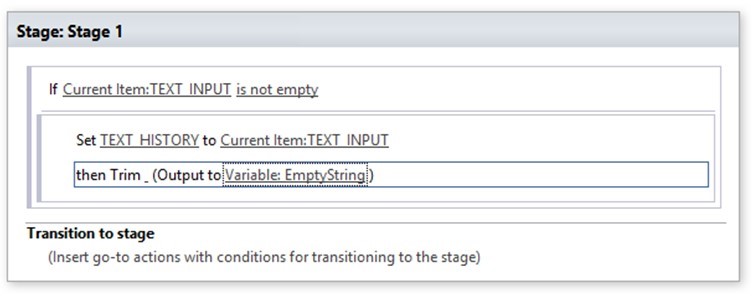
If new text, add to revision history
Click Set Field in Current Item from the Action button’s drop down list in the ribbon.
Set field to TEXT_HISTORY. Set value to TEXT_INPUT.
Clear the TEXT_INPUT field
Now, clear the TEXT_INPUT field since the TEXT_HISTORY contains the text at this point. We’ll start by creating an empty string variable.
Select Trim String from the Action button’s drop down list on the ribbon.
Set string to “ “. (just a blank space – no quotes)
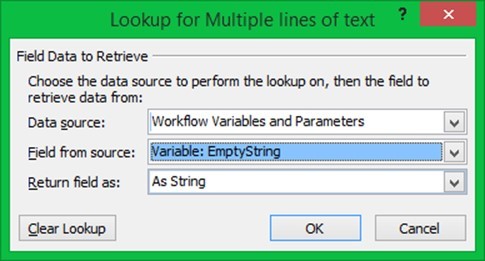
Set workflow variable to a new variable, EmptyString. First, create new variable.
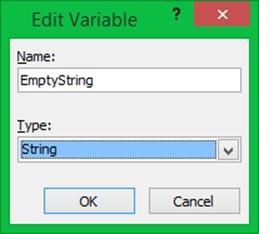
Click OK.
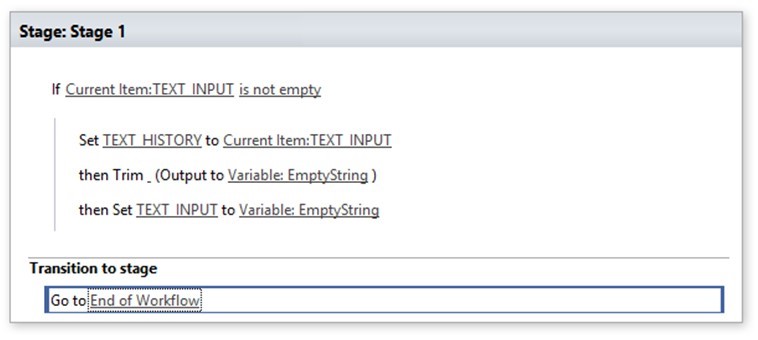
Next, assign that empty string value to the TEXT_INPUT field. Select Set Field in Current Item from the Action button’s drop down list in the ribbon.
Set field to TEXT_INPUT.
Set value to the EmptyString variable.
Finally, set the workflow to end (in SharePoint 2013).
Your workflow should look like the following at this point.
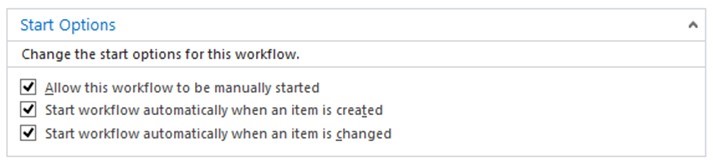
Set Workflow to Run on Create and Change
Now, set the workflow to run when the record is changed.
Click Workflow Settings in the ribbon.
Click the Start workflow automatically when an item is changed and the Start workflow automatically when an item is created checkboxes in the Start Options group.
Publish the workflow.
Modifying your InfoPath form to simulate a single version tracked text field
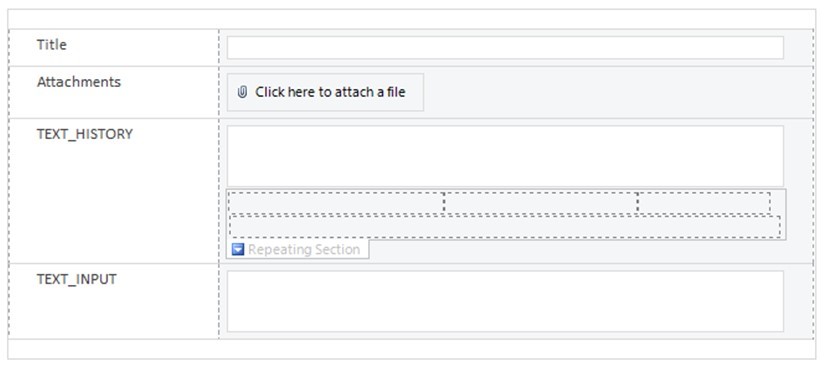
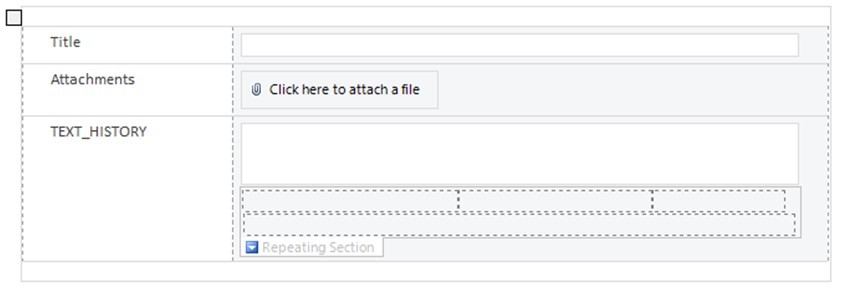
Here’s the default InfoPath form that is created for the list with the two fields created above.
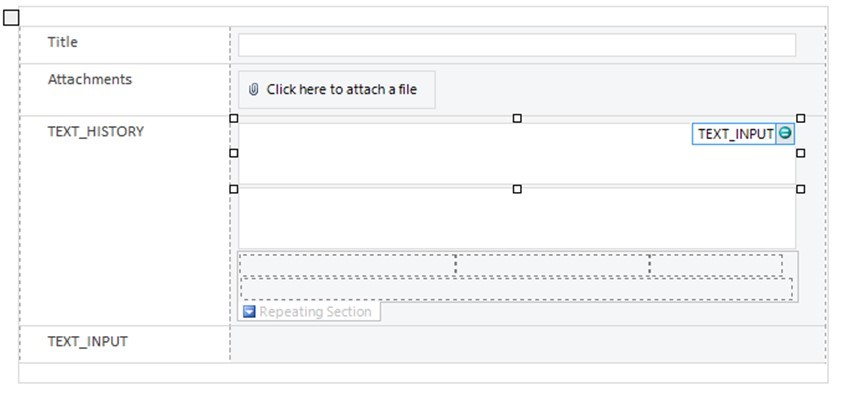
First, we’ll move the TEXT_INPUT field above TEXT_HISTORY.
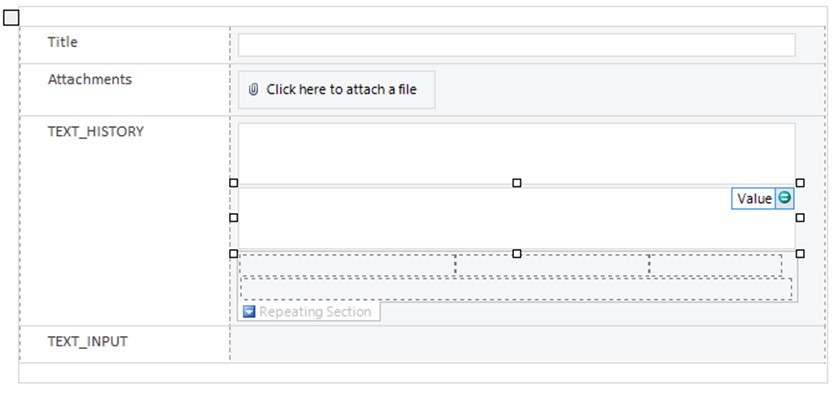
Next, we’ll select the text entry part of the TEXT_HISTORY field and press the DELETE key.
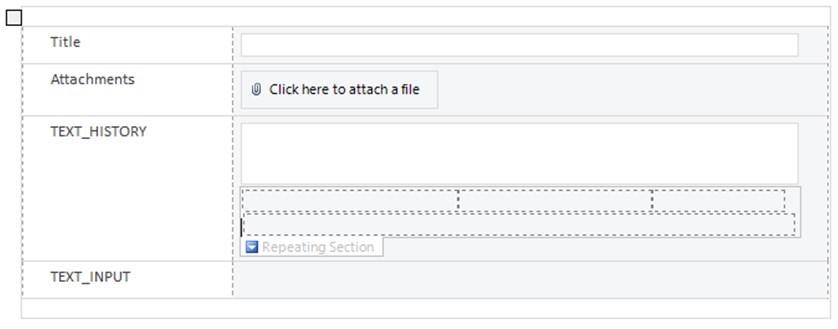
Finally, we’ll delete the TEXT_INPUT row.
Publish this form and you’re basically done. So, that’s the general process to get this all working. Of course, pick the names and formatting that are going to work within your specific custom list and you’re on your way.
In the list, only select the TEXT_INPUT column. There is no value in showing the TEXT_HISTORY column in a list.
When you initially create an item, you’ll see the text you typed in still in the TEXT_INPUT column. It will take a few seconds for the workflow to scrub the data.
Try it out
Create an item for the list.
When you initially save your item, you might see the text you just typed in. If so, that just means the workflow hasn’t had a chance to complete. Wait a few seconds and refresh.
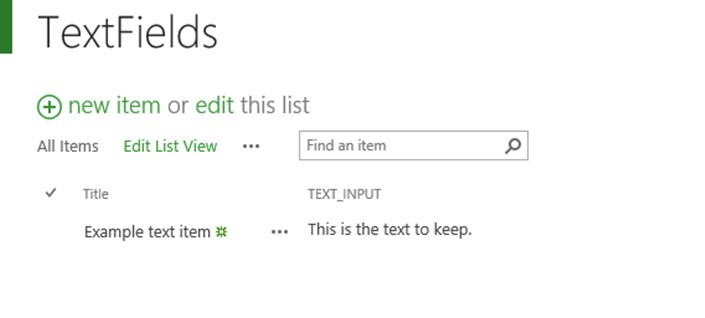
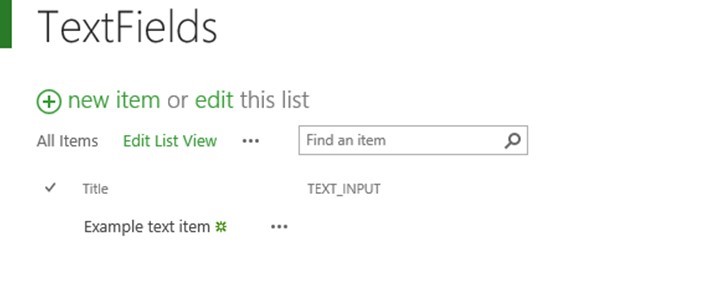
Once the workflow completes you will see the view as below.
In this list view now, you can also enter text directly into the list which is much quicker when you have several items to update. To edit in the list, just click the edit link in edit in this list.
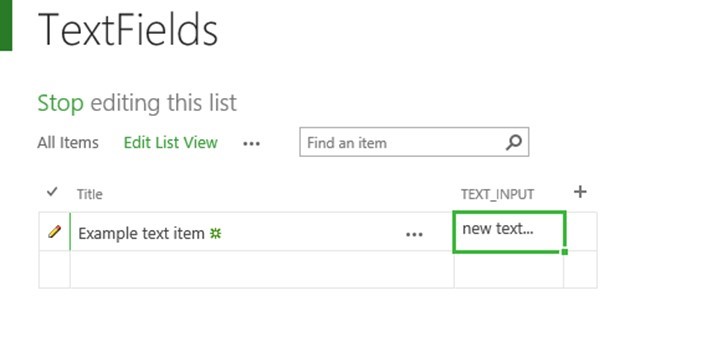
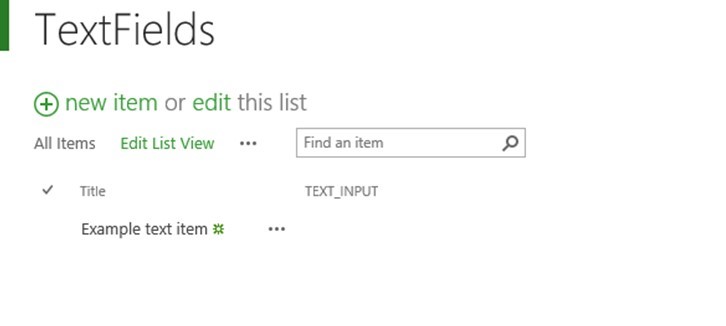
When you move the focus away from that row, SharePoint will make the changes and the workflow will run. Too see that, click Stop editing this list. Again, you might see the text you just typed in the TEXT_INPUT column. Wait for it….. refresh after a few seconds, the text will be cleared out and it will be ready for a new set of notes, comments, or whatever your purpose may be.
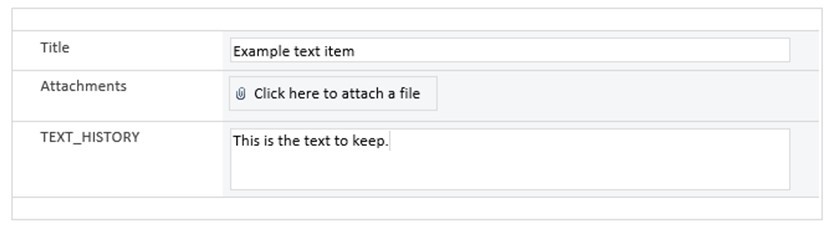
Finally, let’s take a look at the form to see how it looks. Click the title link to open the form.
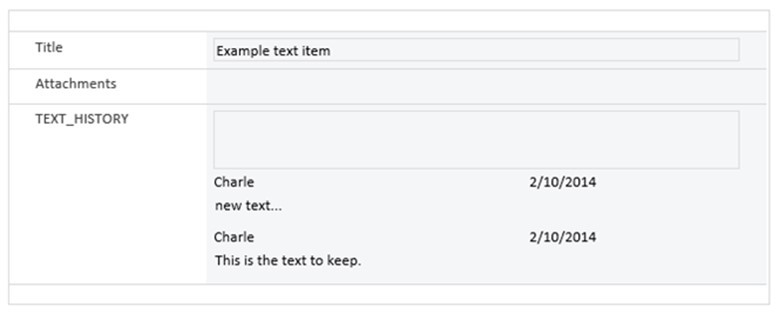
Now you can edit in both the list and the form, and the text edits are retained. How’s that for having your cake and eating it too?
There you go.
Here are some related posts:
 Show the most recent comment from SharePoint text fields instead of “view items”
 How to Erase or Blank a Text Field with a Workflow in SharePoint Designer
 Send email when specific field changes in SharePoint
 How to Bulk Import to SharePoint from Excel with a Choice Field
I have tested this with Enhanced Rich text and it works perfectly fine…Thank you Charlie